

A roof insurance claim usually starts the same way in Bradenton and Manatee County: a loud night, a hard rain, and that sinking feeling when water shows up where it definitely should not. The good news is that storm claims are manageable when you move in the right order, and this guide walks you through exactly what to do, what to document, and where people most often get tripped up.
What a roof insurance claim usually covers after a Florida storm
After a storm, the first question is not just whether your roof took a hit. It is whether the damage came from a covered event or from an old roof finally giving out.
Most homeowners policies treat roof damage as part of dwelling coverage, and they usually cover sudden damage from wind, hail, or falling debris. What they generally do not cover is age, neglect, slow deterioration, or a leak that has clearly been building for months. That distinction matters more than anything else. Insurance pays for sudden loss, not for catching up on maintenance.
That is why the same stain on a ceiling can lead to two very different outcomes. If the stain appeared right after a specific storm and you can tie it to lifted shingles or impact damage, you may have a valid claim. If the roof is 22 years old and the leak has been patched three times already, the insurer may call it wear and tear instead. The Texas Department of Insurance makes this point plainly: old or worn out is not enough by itself.
Here’s the thing: roof claims have gotten tougher. Insurers are paying closer attention to roof age, maintenance history, and storm timing, especially as roof claims rise nationwide. That does not mean a valid claim is hopeless. It means your paperwork and your timeline need to be clean.
Prerequisites: What to gather before you start your roof insurance claim
Before making calls, pull everything into one place. A claim feels ten times harder when you are hunting for documents while rain is dripping into a bucket in the hallway.
Your insurance policy and declarations page
Start with your declarations page. That is the quick snapshot of your policy, including coverage amounts, deductibles, and endorsements. Then look at the full policy for the parts that affect roof claims most: dwelling coverage, wind or named-storm deductibles, exclusions, and settlement terms.
Pay close attention to whether your roof is covered at replacement cost or actual cash value. That one detail can change your payout by thousands. More on that in a minute.
Photos, videos, and the storm date
Save every photo and video tied to the storm, including exterior damage, interior stains, dripping water, and debris around the home. If rain started coming through the ceiling at 4:30 on a Tuesday afternoon, write that down and keep the photo from that same afternoon. A timestamped image taken when the problem first showed up can carry real weight.
Basic roof information
Write down your roof’s age, material, any past repairs, and whether it has leaked before. If you have invoices from past roofing work or a prior inspection report, save those too. A claims adjuster is trying to answer a simple question: was this storm damage, or was this roof already failing?
Emergency contact list
Keep a short contact list ready: your insurance company, a trusted local roofer, and a mitigation company if active leaking needs immediate attention. Save names, phone numbers, and claim email addresses in your phone now, not after the next storm rolls through.
Step 1: Check for storm damage safely and stop any active leaks
This step is about protecting your home without creating new problems.
- Wait until the storm has fully passed and conditions are safe.
- Walk your property from the ground and look for obvious signs of damage.
- Take temporary steps inside to limit additional water damage.
- Write down what changed right after the storm.
Success here looks simple: you have a safe first look, the leak is contained as much as possible, and you have not disturbed evidence you may need later.
Start from the ground, not the roof
Do not climb onto a wet roof. Not for a quick peek, not for one photo, not even if the damage looks minor.
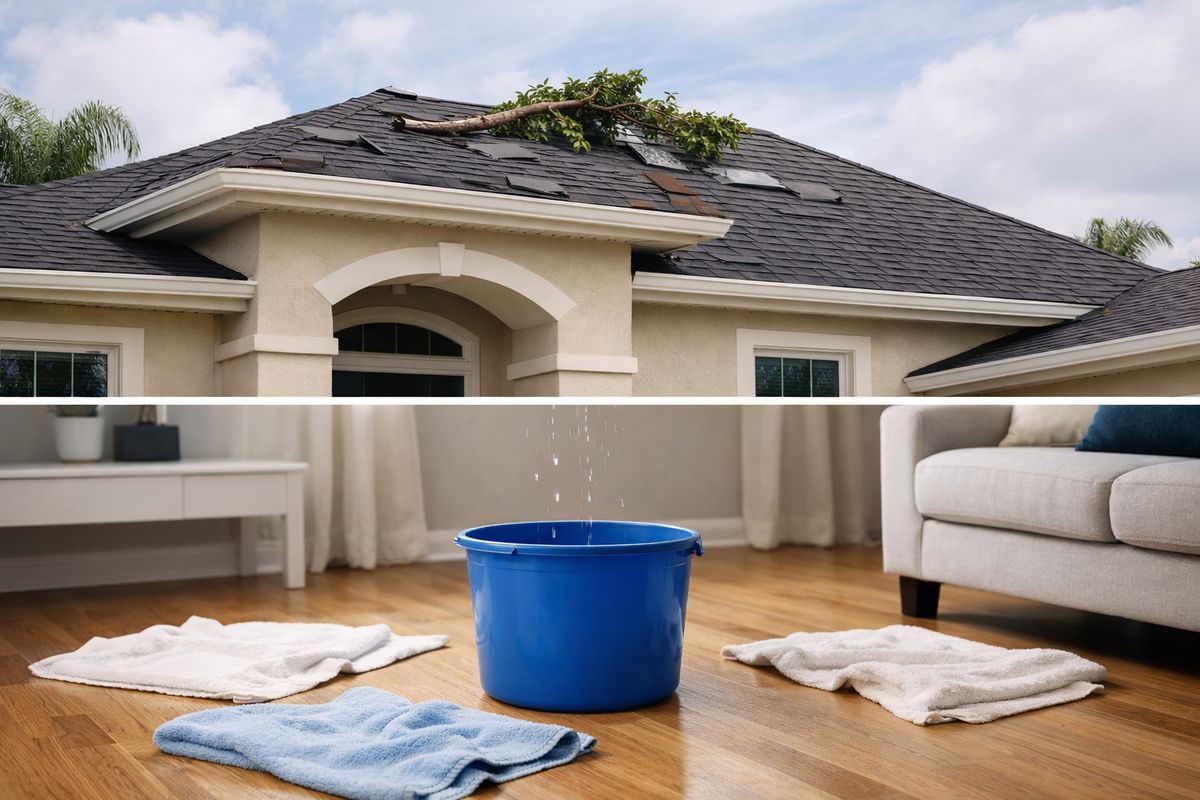
Start at ground level and look for missing or lifted shingles, branches on the roof, granules collecting near downspouts, dented gutters, damaged soffit or fascia, sagging sections, and bent screens or pool-cage framing. Safe, ground-level documentation is the right move, and even claims guidance aimed at homeowners says not to climb when preparing evidence.
Protect the inside of your home
Move furniture, electronics, rugs, and anything else under the leak. Put down towels, place buckets where needed, and relieve trapped water in bulging drywall only if necessary to prevent a collapse or larger mess. If the roof is actively open to weather, temporary tarping or emergency mitigation may be needed fast.
Insurance usually expects you to take reasonable steps to prevent further damage. That does not mean starting full repairs. It means doing the common-sense things that keep a small problem from turning into a much bigger one.
Write down what you noticed right away
Keep a basic damage log. Date, time, where the leak appeared, what you saw outside, and what changed over the next day or two. Nothing fancy. A simple note on your phone works fine.
If the issue spreads from one bedroom ceiling spot to a hallway stain by the next morning, add that. A clean timeline helps later if anyone questions when the damage started.
Step 2: Document everything before repairs begin
Documentation is the backbone of a strong claim. Cleanup can wait long enough for you to capture the story clearly.
- Take wide and close photos before anything gets moved or removed.
- Save proof of the storm date and weather conditions.
- Photograph interior damage, including attic signs.
- Keep every receipt tied to emergency work.
A good checkpoint here is this: if someone who has never seen your house can look at your file and understand what happened, you are on the right track.
Take wide shots and close-ups
Take photos of the whole roofline from multiple angles, then zoom in on specific damage. Capture each visible slope, gutters, vents, flashing, screens, siding, ceiling stains, and damaged belongings. Wide shots show context. Close-ups show the actual problem.
Insurers look for both. In fact, timestamped photos are often the strongest evidence in a storm claim because they help tie damage to a specific event instead of leaving room for guessing.
Save weather evidence and repair receipts
Save local weather alerts, radar screenshots, storm-date news coverage, and any messages about severe wind or hail in your area. Then save receipts for tarping, mitigation, cleanup, or emergency service calls.
That paperwork does two useful things. It links the damage to an actual storm event, and it shows you acted reasonably to prevent more loss.
Check the attic and ceilings
Look in the attic for wet insulation, dark roof decking, fresh staining, damp framing, rusted nails, and musty smells. Inside the home, photograph water spots, bubbling paint, sagging drywall, and any new discoloration around vents or light fixtures.
Minor roof damage can hide bigger problems underneath. A small stain can act like a loose thread on a sweater. Pull on it too late, and the whole thing unravels.
Step 3: Review your policy before you file
This is where insurance language starts to matter. A quick review now can save a lot of frustration later.
- Check how the roof is valued under your policy.
- Confirm your deductible for storm-related losses.
- Look for exclusions, age limits, and filing deadlines.
- Make sure the claim is likely to exceed your out-of-pocket cost.
Know whether you have replacement cost or actual cash value
Replacement cost value means the policy pays what it costs to repair or replace the damaged roof, minus your deductible. Actual cash value means the insurer subtracts depreciation for age and wear first.
That difference is not small. In the NAIC example, two families with the same $15,000 roof loss ended up with wildly different payouts because one had replacement cost and the other had ACV. If your roof is older, ACV can shrink the check fast.
Check for wind, hail, and named-storm deductibles
Many policies use a separate deductible for wind, hail, or named storms, and it may be much higher than your standard deductible. That means a claim that looks worthwhile at first glance may barely clear your out-of-pocket cost once the actual deductible is applied.
Read the declarations page carefully. If you see a percentage deductible for hurricane or wind loss, do the math before filing.
Watch for exclusions and filing deadlines
Look for wording around wear and tear, repeated leaks, cosmetic damage, older-roof limits, and filing deadlines. Some carriers are tightening timelines, with 365-day windows becoming more common for roof claims.
Waiting too long is one of the easiest ways to weaken a valid claim. Even if you are still gathering estimates, open the claim within the policy deadline.
Step 4: Get a professional roof inspection from a reputable local contractor
A good inspection does more than price the job. It helps sort out whether your roof needs a repair, a partial replacement, or a full replacement.
- Schedule an inspection focused on storm damage.
- Ask for photos, marked damage areas, and written findings.
- Compare the reported damage to what you saw from the ground.
- Make sure the contractor is local, licensed, and insured.
Ask for a storm-damage inspection, not just a quote
A quote tells you what somebody wants to charge. An inspection tells you what happened.
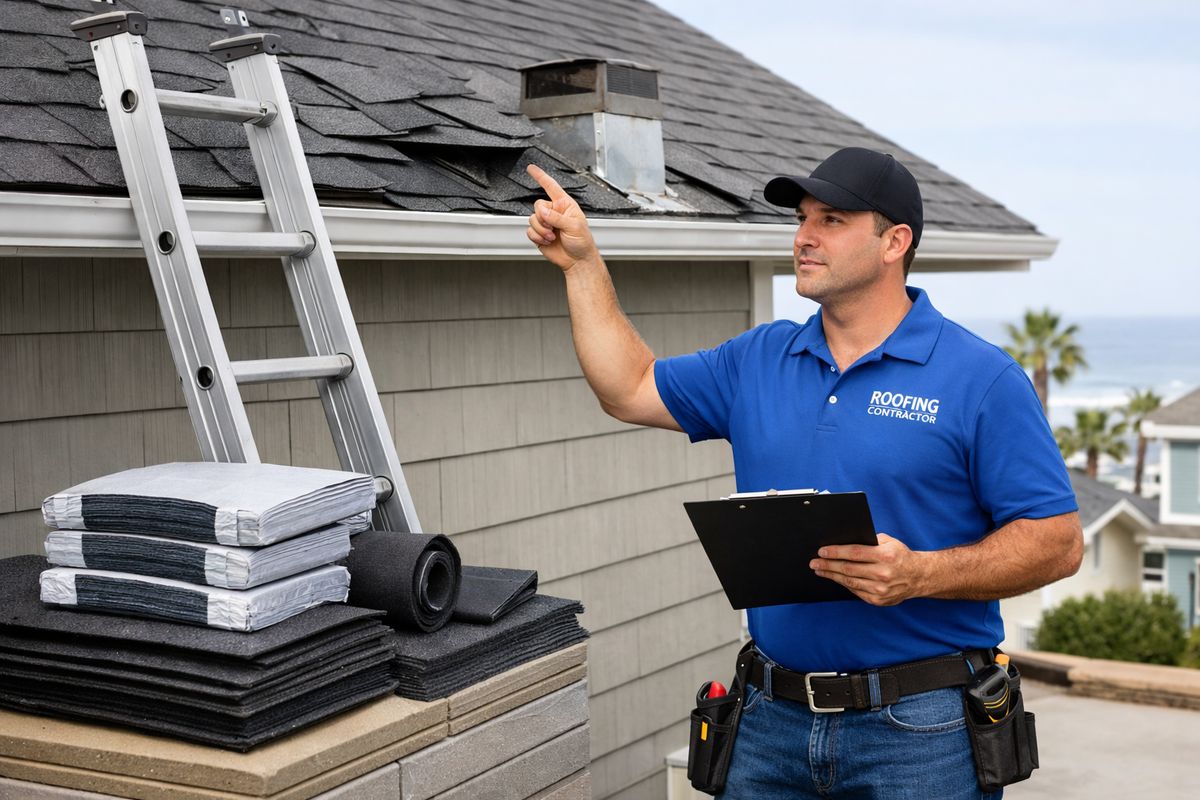
Ask for a written inspection that identifies damaged materials, affected slopes, signs of wind uplift, punctures, broken seals, flashing damage, and probable storm-related causes. That gives you something useful for a claim, not just a number scribbled at the bottom of a page.
Look for signs of repairable damage versus replacement-level damage
Isolated missing shingles or a small area of damage may be repairable. Widespread creasing, repeated leaks, broken seals across multiple sections, underlayment failure, decking issues, or discontinued materials often point toward replacement instead.
This matters more with older roofs in coastal Florida, where sun and salt air have already done years of work before the storm arrives. If you are already comparing longer-lasting options, it helps to understand how concealed-fastener metal panels perform, especially in high-wind areas. For some homes, replacement is the cleaner answer than one more patch.
Choose a contractor carefully
Avoid storm chasers, door knockers using pressure tactics, and anybody pushing paperwork before explaining the scope. A good contractor has a local presence, proper licensing, insurance, references, and clear documentation.
Be extra careful with promises that sound too easy, especially anything like “sign here and you will owe nothing no matter what.” Claims and roofing contracts should never feel like a magic trick.
Step 5: Decide whether filing a roof insurance claim makes sense
Not every roof problem should become a claim. Damage can be real and still not be worth filing for.
- Compare expected repair cost to your deductible.
- Factor in roof age and policy type.
- Consider whether a repair will actually solve the problem.
- File if the damage is meaningful and clearly storm-related.
Compare the repair cost to your deductible
If the repair estimate is only slightly above your deductible, filing may not help much. For example, a $4,500 repair against a $3,000 deductible may not justify the hassle, especially if the roof is older and depreciation may reduce payment further.
Do the simple math before opening a claim. It is not exciting, but it keeps you from starting a process that leads nowhere useful.
Factor in roof age and prior condition
Older roofs often face tougher claim treatment. Some insurers are shifting aging roofs to ACV, limiting replacement coverage, or looking much harder at maintenance records and condition. That is especially true as carriers tighten rules for older roofs.
If your roof is 15 to 20 years old, assume age will come up. Be ready with photos, repair records, and a clear storm date.
Know when a replacement is more realistic than another patch
If your roof has widespread damage, repeated leak areas, or materials that are discontinued, another patch may just buy a few months of calm before the next problem. A full replacement can be the more honest solution.
That is not cheap. A new roof can run anywhere from $10,000 to $40,000 depending on size and material, which is exactly why a valid claim matters. If replacement is on the table, stronger systems such as metal roofing options in Bradenton may also be worth a look for future storm resistance.
Step 6: File the roof insurance claim and keep the details organized
Once you decide to file, do it cleanly.
- Open the claim by phone or online.
- Give the date of loss and a short factual description.
- Save the claim number immediately.
- Put every document into one folder.
Call your insurer or file online
Have your policy number, storm date, address, photos, and a brief description ready. You usually only need the basics: when the storm happened, what damage you noticed, and whether emergency tarping or mitigation has already been done.
Prompt filing matters because claim timing can affect coverage. The goal is not to tell the whole life story of your roof on the first call. The goal is to open the claim accurately.
Describe the damage clearly and briefly
Stick to facts. Say what you observed.
A strong description sounds like this: “After the storm Tuesday evening, water staining appeared on the back bedroom ceiling and shingles were visible in the yard.” That is better than guessing about hidden structural damage or overstating what you cannot yet prove.
Create one folder for every claim document
Use one digital folder, one paper folder, or both. Save claim numbers, emails, policy pages, inspection reports, receipts, photos, and notes from calls. If a conversation happens by phone, write down the date, time, and what was said.
That one habit makes the whole process feel less like a junk drawer and more like something you can actually manage.
Step 7: Prepare for the adjuster inspection
After the claim opens, the insurer will usually schedule an adjuster visit. This inspection matters because it shapes the first estimate.
- Be there if possible.
- Have your evidence ready in one place.
- Share the contractor’s inspection report.
- Ask what the adjuster is documenting and what happens next.
Be present if you can
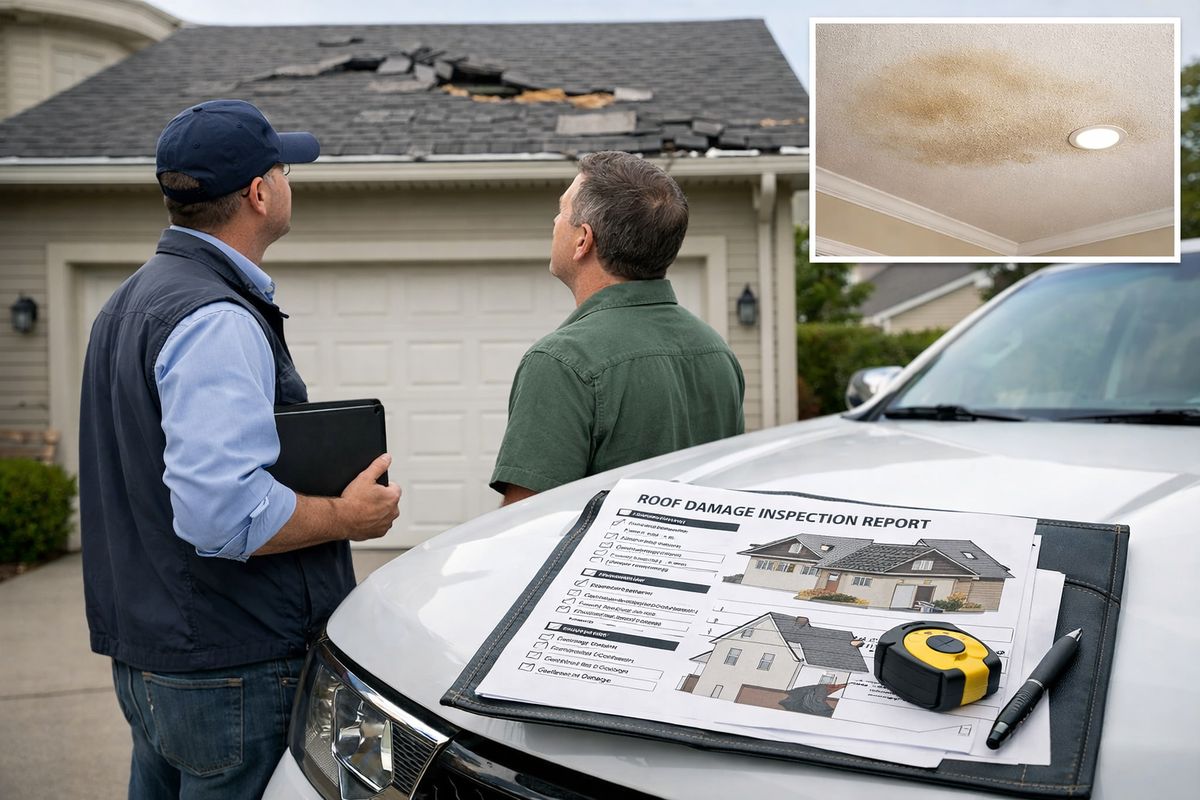
If you are there, you can point out the ceiling stain that spread after the storm, the attic moisture, the dented gutter run on one side, and the slope with missing shingles. Small details get missed when nobody is there to connect the dots.
Have your contractor’s inspection report available
A contractor’s report can help the adjuster see the full scope, especially when damage is subtle from the ground or spread across several roof sections. Keep the tone practical, not combative. The point is to make sure all visible damage is considered.
Ask what the adjuster is documenting
Ask polite, direct questions. Which slopes are being inspected? Are accessories like flashing, vents, and gutters included? Are interior damages being noted? When should you expect the estimate?
Clarity beats confrontation every time.
Step 8: Review the insurance estimate and settlement carefully
An approval is not the same thing as full payment for everything needed. Read the estimate line by line.
- Compare the insurer’s scope to your contractor’s findings.
- Check what was included and what was left out.
- Understand depreciation and payment timing.
- Look for code-related costs.
Compare the scope of loss to the contractor’s findings
Does the estimate include all damaged slopes, flashing, underlayment, drip edge, vents, gutters, disposal, and labor? Under-scoped claims often show up here, not in the initial approval letter.
Read slowly. Missing one component can throw the whole job off.
Understand depreciation and recoverable depreciation
Depreciation is the amount subtracted for age and wear. In some replacement cost policies, the insurer pays part of the claim first, then releases recoverable depreciation after work starts or finishes and invoices are submitted. Some insurers pay in two checks for that reason.
If you only received one partial payment, do not assume the claim is finished. Check the estimate for withheld depreciation.
Check for code upgrade issues
Florida has strict wind-related building standards, and code can change what the job actually costs. Underlayment requirements, fastening patterns, and replacement scope may all be affected by current rules. If code-required items are missing, the estimate may need a supplement.
Step 9: Respond if the payout is too low or the claim is denied
This part is frustrating, but it is still manageable if you stay organized.
- Read the insurer’s explanation carefully.
- Compare it to your evidence and contractor report.
- Request a reinspection if damage was missed.
- Escalate only if documentation supports it.
Ask for a reinspection with supporting evidence
If the estimate misses damage, ask for a reinspection and send better photos, the contractor’s report, attic documentation, and a clear explanation of what was overlooked. Keep it factual. Emotional language does not help. Specific evidence does.
Request the denial reason in writing
If the claim is denied, get the reason in writing. Was it wear and tear, late reporting, excluded peril, cosmetic-only damage, or lack of proof connecting the damage to the storm? You cannot respond well to a vague answer.
Know when to bring in extra help
For large losses or stubborn disputes, it may make sense to talk with a public adjuster or an attorney. That is usually not the first move, but it can be the right one when the gap between actual damage and the insurer’s position is too wide to ignore.
Step 10: Complete the roof repair or replacement and close out the claim
Once the claim is approved, the job still has to get done properly.
- Schedule the work in writing.
- Confirm materials and scope before the crew starts.
- Save all invoices, photos, and completion documents.
- Send final paperwork to the insurer if more payment is due.
Schedule the work and confirm materials
Make sure the written scope matches the approved claim and your contractor agreement. Confirm shingle type, underlayment, flashing, ventilation, and any upgraded wind-resistant materials before delivery day.
Save invoices, completion photos, and final paperwork
Keep final invoices, permit records if applicable, material receipts, and completion photos. Insurers often need this paperwork to release any remaining depreciation or close out the claim.
Get a final inspection and warranty details
Before considering the job finished, confirm the work was completed properly and get warranty details in writing. Save both workmanship and manufacturer warranty information with your claim file. Future-you will be glad it is there.
Common problems that can derail a roof insurance claim
A lot of claims go sideways for the same handful of reasons. Spotting those early helps you avoid them.
“The insurer says it’s wear and tear, not storm damage”
This is common with aging roofs. Your best response is documentation: storm date, photos from right after the event, interior damage timeline, and a detailed inspection that explains why the damage pattern fits wind or storm impact rather than long-term decline.
“The damage looks small, but the leak keeps spreading”
That happens all the time. A few lifted shingles or one puncture can let water travel under materials and show up far from the entry point. If the stain is growing, the damage may be larger than the exterior view suggests.
“The contractor wants me to sign fast”
Slow down. Do not sign an assignment agreement or broad authorization you do not fully understand just because somebody is standing in the driveway acting urgent. Good contractors explain the scope, the process, and the paperwork without pressure.
“The insurance estimate is missing part of the job”
If flashing, ventilation, underlayment, or code-required items are left out, ask your contractor to prepare a supplement request or supporting scope comparison. Missing line items are common, and they can often be corrected with proper documentation.
What to expect after the claim and what to do next
Most claims end in one of four places: approved repair, approved replacement, partial payout, or denial. None of those outcomes means you are stuck. It just tells you what the next move is.
If the claim is approved
Expect an initial payment, scheduling with your roofer, work completion, and then final paperwork if more funds are owed. That is the normal rhythm. Keep documents organized and stay in touch with the contractor so the claim does not stall out halfway through.
If the claim is denied or only partly covered
Read the denial or partial coverage letter carefully, gather stronger evidence, and decide whether to request reinspection or appeal. Calm, specific documentation usually gets farther than angry phone calls.
Try this this week
Pull out your declarations page, check whether your roof coverage is replacement cost or actual cash value, and save your storm photos in one folder. That one hour of prep can make the next Florida storm a lot less chaotic.
Frequently Asked Questions
How long do you have to file a roof insurance claim after a storm?
It depends on your policy, but some insurers use deadlines as short as 365 days after the storm. File promptly and check your policy language right away so you do not lose leverage by waiting.
Will insurance pay for a full roof replacement?
Insurance may pay for a full replacement if the damage is from a covered storm event and the roof cannot be reasonably repaired. If the roof is old, poorly maintained, or covered under actual cash value, the payout may be lower than expected.
Should you call a roofer or the insurance company first?
If it is safe, start by documenting the damage and arranging a professional inspection quickly. A good roofer can help you understand the scope before or just after you open the claim, especially if active leaking needs emergency attention.
What if your insurance estimate is lower than the contractor’s estimate?
Compare the scope line by line. The difference is often missing items, not just price. If parts of the job were omitted, ask for a supplement or reinspection with supporting photos and documentation.
Can you make temporary repairs before the adjuster comes?
Yes, reasonable temporary steps to prevent more damage are usually expected. Tarping, catching water, and moving belongings are fine. Just document everything first and save receipts so the temporary work does not muddy the claim.
Does filing a roof insurance claim mean your insurer will replace the roof because it is old?
No. Insurance does not replace a roof just because it has aged out. The claim still has to be tied to a covered loss such as wind or storm damage.